

Ok, this post has been a lonnnnnnngggggg time in the making, sitting patiently in the background waiting to shine. This is also my very first tutorial so be nice... I actually didn't approach this project with a tutorial in mind, simply decided along the way, so I'm hoping it all makes sense.
Don't you know a little one that just needs one of these ruffle front dresses? If so, read on.
Step 1:
Find a dress pattern: First you need a pattern for an a-line dress or even a jumper/pinafore. Depending on the age of your child I can highly recommend the FREE Toddler Swing Top pattern by Kelli of True Bias (hence the pun in the post title), which I used for this dress. A disclaimer before you get too excited: this pattern is in size 2T only, so if your little munchkin is another size you'll need to look elsewhere. Or if you're clever you might be able to grade this one up or down. My little one was nearly three and I made some pretty simple changes to get it to fit.
Now this pattern is for a top, so in order to make it dress length I simply measured a few of M's RTW dresses for length and extended the pattern accordingly. I added about 8 inches to the length following along and extending the a-line of the pattern. I also added about 1cm to the top of each shoulder seam as I found the armhole a bit snug when I made M the top at an earlier pre-blogging time. I find M grows up but not out, so often in a forgiving pattern you'll just have to fiddle with length and armscye depth a bit.
I wanted a decorative hem (no turn up), so I cut it 1.5cm longer than the actual desired finished length. If you want to hem your dress with a turn up, you'll need to account for this when deciding on dress length.
Step 2:
Choose an absolutely adorable fabric for your dress. M is a bit of a Dora fan so when I saw this fabric on sale for $5 per metre I snapped it up. It's a bit of a weird fabric, certainly cotton, but more of an uncoated decor/ curtain weight.
Step 3:
Prep the pattern and fabric and cut out the pieces. You'll also need to cut some bias strips 2 inches wide and at least 2 times the length of the dress front. You can join a few bias strips together to create the length you need. (I'm not going to walk you through this, but a good tutorial can be found here).
Step 4:
Mark the centre front line of the dress. The dress front is cut on the fold, so I simply kept the piece folded and pressed it lightly along this fold to give me a visual to work with.

Then open out the piece and on the RIGHT SIDE use tailors chalk (or a washable ink pen, or really anything as it'll be covered by the frill forever more) and a rule to mark the centre line on the fabric, from neckline to hem.

Step 5:
I chose to complete some of the construction before attaching any ruffles. I sewed the centre back seam, the shoulder seams and bound the neckline, BUT I did not sew the side seams.
Step 6:
Create your ruffle. Ok, so you should have created a bias strip about double the length of the dress front. You do not need to finish the long edges as cutting on the bias prevents huge fraying, and I wanted the edges to fray just a little after a few washes to add to the look. You will need to finish the short ends and I chose one of my sewing machine's decorative stitches that I also wanted to use for the hem (see Step 9 below). But you could turn and hem the ends if you choose to.
We need to sew a gathering stitch right down the centre of the bias strip. A gathering stitch involves a long straight stitch (I set my stitch length to 5mm) with a lower tension (I set mine at one point below regular). As the strip is 2 inches wide I simply aligned the right edge of my bias strip at the 1 inch marking on my throatplate. Go ahead and sew that gathering line, I'll wait...

Next we are going to gather the strip. Pull on one of the threads at one end of the strip (not both bobbin and needle threads, just one or the other). You'll see the band start to gather up and you want to keep going until your ruffle is the length of your desired finished length of the dress front (after hemming or finishing). Make sure the gathers are even up the length of the strip.
 |
| Euw... ignore that dirty ironing board cover |
Step 7:
Attach your ruffle. Lay out your dress front on a work surface (I used my ironing board for everything!). Starting at the top align one end of the ruffle to the top of the neckline.
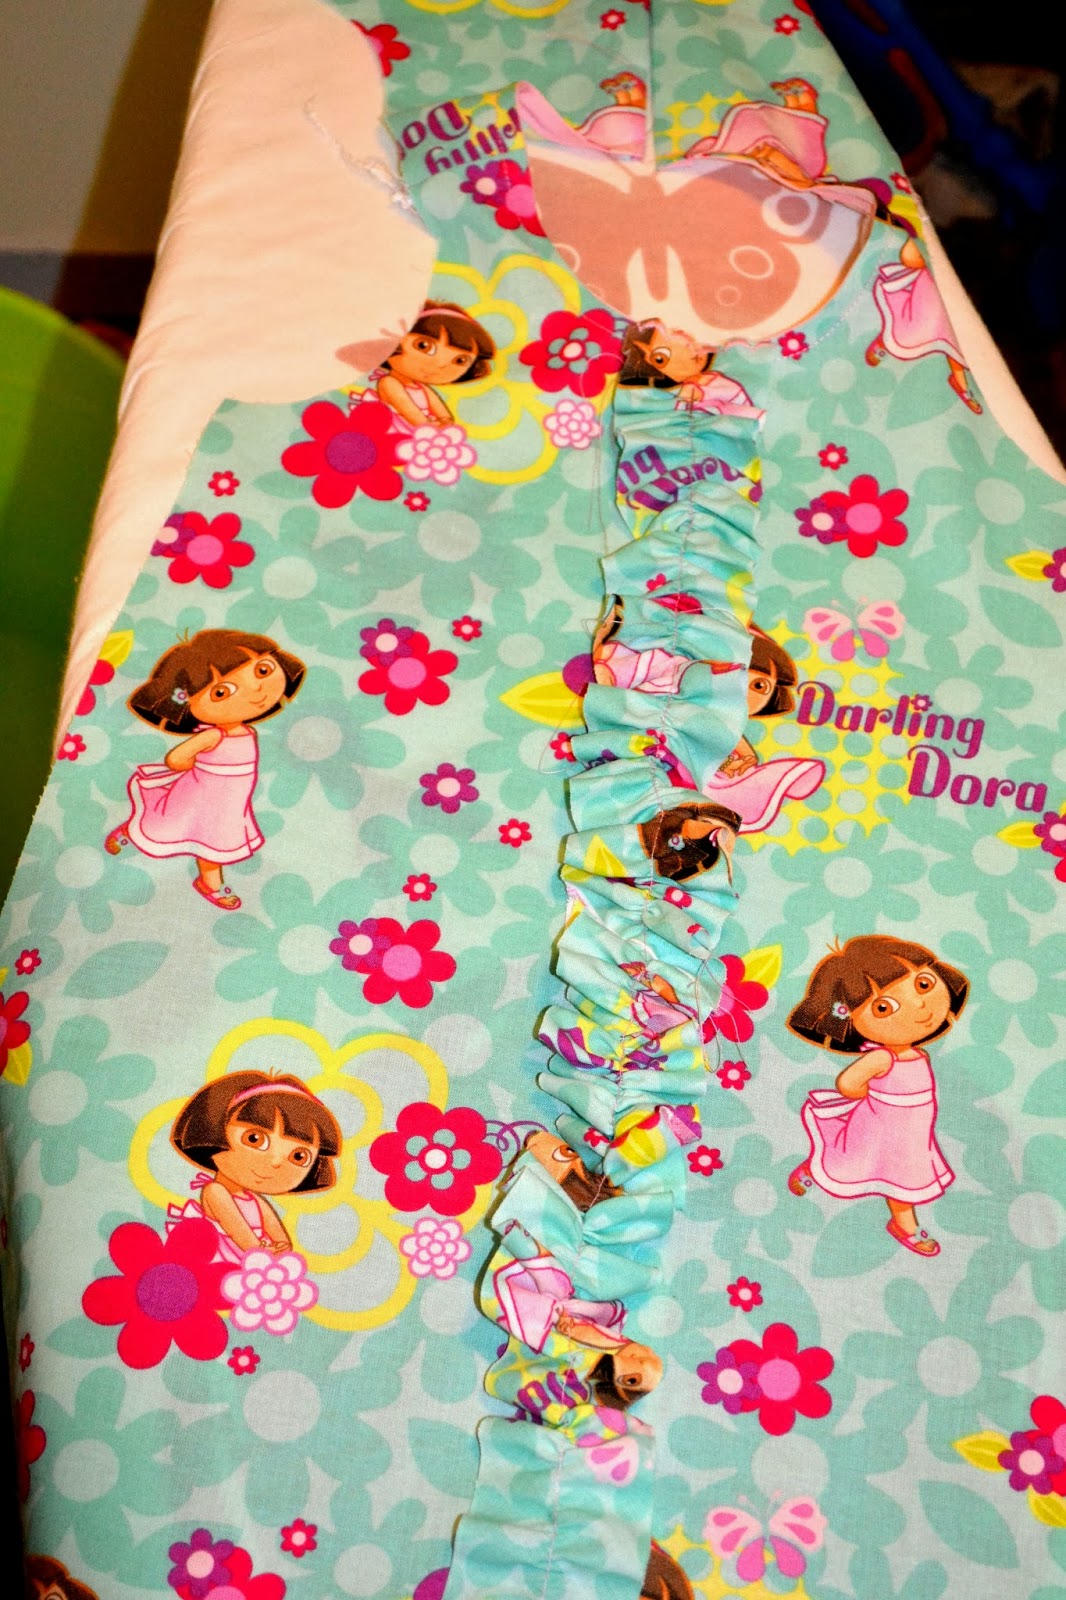
Make sure if you have a one directional print that you have the ruffle right side to the top. Using your chalk line as a guide start pinning the ruffle to the dress front aligning the gathering stitch line with your chalk line (middle of dress front). You may need to adjust your gathers as you go to ensure they are neatly distributed and the ruffle is the right length.
Make sure you have re-set your straight stitch for regular sewing. Align the gathering stitch of the ruffle right under you needle and sew the ruffle to the dress front, along the gathering stitch, all the way to the bottom.

And you now have a ruffley dress front! Yay you!
Step 8:
Continue on with the rest of the construction: sew your side seams, make a button loop, and attach your button (see the True Bias Pattern instructions for more info).

Step 9:
Finish your hem. As mentioned at the beginning of the post I cut my dress at the desired finished length plus 1.5cm: I envisaged a gorgeous decorative stitch instead of a turned hem as can be seen here...
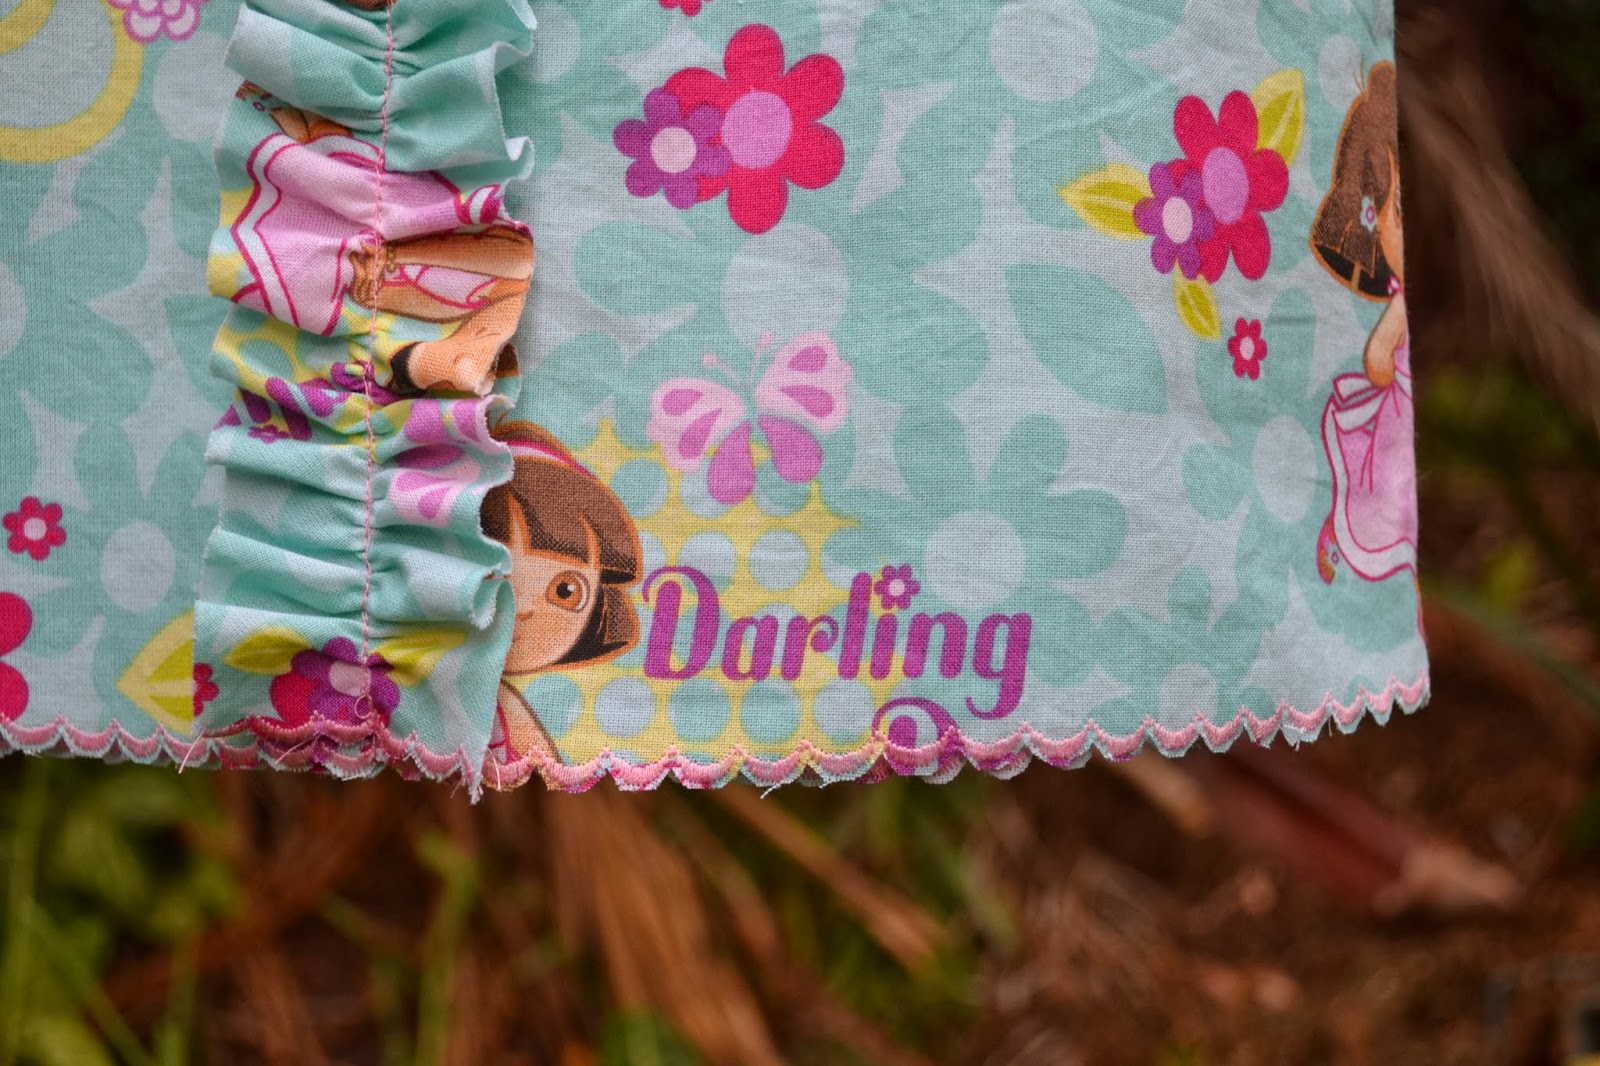
This is a scallop stitch/embroidery. I simply sewed the stitch all around the hemline approx 1cm above the bottom. Then I used scissors to cut around the curves very carefully to create a scalloped edge. Don't worry, the edge softens after a few washes so it doesn't continue to look jagged.
And you're done! Yay! You have your very own ruffle front dress!

Hopefully you have an equally gorgeous child to fill it....

Need a weekend project? Done! Go to it...
Adorable! :)
ReplyDeleteThanks Carolyn. It helps having a cute toddler to do the modelling!
DeleteThis is too cute!
ReplyDeleteEpic work on your first tute :D
Thanks Amanda! Let's see if anyone uses my epic tute :)
Delete